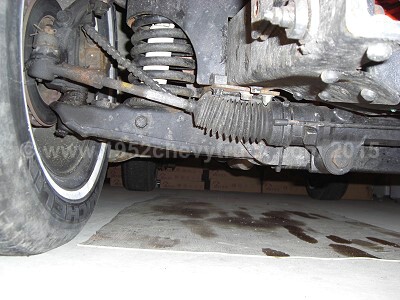
1. Front steering rack adjustment.
Over the winter there has been a great deal of progress made to improve the handling and ride of this 1952
Chevy truck. Although some improvements had been made, there was still a “bump-steer” problem and the ride
and handling were far from perfect. The Mustang II type front suspension upgrade is fitted to this truck and
a problem was identified relating the position of the rack. Originally the rack was a manual one. The truck
had bump-steer problems and when the power rack was fitted in the same place as the manual rack last summer,
the bump-steer problem was exactly the same. It was noticed that the arms at the end of the rack were not
horizontal. They were pointing upwards at an angle of about 35 degrees looking from the front. Also they were
pointing forwards (looking from above). It was realized a misalignment problem of that type would cause any
slight dip or bump in the road surface to pull the wheels all over the place during normal driving – and
they did! Looking at pictures of the Mustang II kits in catalogues always showed these arms to be horizontal.
An example of a Mustang II hub to hub kit.

Talking to the suspension company “Heidts” it became clear that the welded-on brackets on the front of the
cross member that held the rack, did not angle upwards and also that there should be two additional round
thick spacers that moved the rack further forwards of the cross member. Angling of the rack has an additional
benefit, it allows the angle between the lower parts of the steering column and the rack input shaft to be
less acute. The brackets and spacers were ordered from Heidts and they arrived. Taking the rack off and
fitting new (angled) brackets would have been a two day job as the access is very poor. It was decided instead
to cut the bottom of the existing (non-angled) brackets, then angle them upwards and weld in some metal to fill
the gap at the bottom. This would make them similar to the new brackets. An additional benefit of this method
is that the angle could be adjusted in the bending / tilting process so that the rack could be as high as
possible without touching the chassis. If new brackets were to be fitted, the rack might then foul the chassis
rails and then the whole rack would have to be pulled off a second time to modify the new brackets. Working
with what we had would be much easier. After the alteration was completed, the round spacers were also fitted.
To summarise, the rack was tilted, moved forwards and lifted. The result of this did not bring the ends of the
rack horizontal (looking from the front). The final angle was, maybe about 15 to 20 degrees (much better than
35 degrees). The mod. did, however, move the rack forward as well so looking from above, the rack ends were now
correctly aligned. During this upgrade it was decided to check the upper and lower suspension arms. It was found,
by measuring to a central reference point at the front of the truck, they were in fact misaligned. The top and
bottom arms on each side were not the same distance from the reference point. To put it another way, the top
arm was either forward or backwards of the lower arm and they were not even the same when comparing the left
and the right hand sides. This was all corrected during the rack modification and completed by the end of Feb. 08.
When the truck was road tested, the handling of the truck was much improved. It was not clear how much the
misalignment of the arms had contributed to the problem but the corrected position of the rack was a key factor
Update 2017 When you read on you will see more upgrades over the years including "Speedway Motors"
Mustang II tubular suspension arms and in 2015 a new IDITIT steering column.
Update 2020 In 2019 the ifs was replaced with a TCI custom IFS. See the 2019 ifs update.
2. New front springs.
The next plan was to bring the ends of the rack fully horizontal by fitting new stiffer front springs, or use a
spring spacer. It was decided to buy both but to try the stiffer springs first. 325 lb springs were ordered
from “Heidts” and were duly fitted. The amount of lift was smaller than expected. The truck did not rise more
than 12mm (and that would probably settle back down) and the arms were still not horizontal although they were
better. In the middle of this corrective upgrade it was also discovered that one of the ball joints was not
tight and this certainly contributed to the steering having an unpredictable feel to it. Also the hole in the
arm that held the ball joint had been elongated by the loose ball joint and was now a slot! The ball joint was
tightened up and a note was made to correct the slot problem later. The road test showed another big improvement.
We could have fitted the spring spacers but the new springs did not seem to be any stiffer than the old springs
(after a bouncing test). Heidts were contacted and agreed to take back the springs and supply 375lb springs.
This was done and late in March the stiffer springs were fitted. This made a big difference to the angle of the
rack ends. The front of the truck rose 50mm (although it could settle back 10mm or so) and the ends of the rack
were now horizontal. During this upgrade to stiffer springs the elongated hole in the control arm was expertly
welded back to a circle. Clearly this saved having to order and pay for a new arm!
In the road test, bump-steer had now been completely eliminated and the ride was also much better. Road surfaces
seemed remote and really the ride and handling was similar to that of a modern truck or SUV even though the rear
springs still needed attention.
Update 2017 Several times over the years the front springs were changed again to adjust the ride height.
see upgrading the front suspension (2010).
and upgrading the steering (2015).
Update 2020 In 2019 the ifs was replaced with a TCI custom IFS. See the 2019 ifs update.
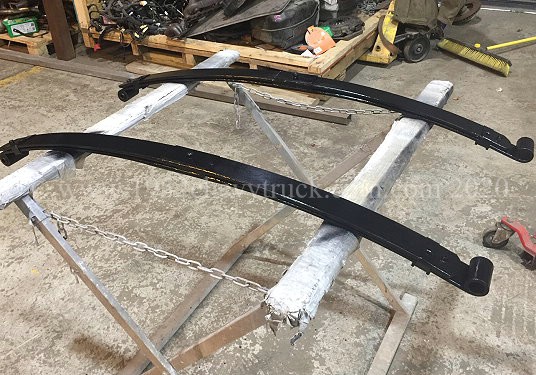
March 08 Rear Springs
The next step was to fit new (original) rear leaf springs. It was expected there would be an improvement here as the
existing springs were old and the left side had 5 leaves and the right side and 4 leaves! The original springs for this
truck have 8 leaves on the left and 8 on the right. These were ordered from “Obsolete Chevy Parts” and fitted late in
March 08. They had the effect of raising the truck about 100mm and making the rear suspension so stiff that the
truck bounced along the road! At the beginning of April it was decided to take 4 leaves out of each 8-leaf spring.
This brought the suspension back down to a level about 25mm above the level of the old springs (and 10mm might
disappear with settlement). The truck now drove smoothly. In fact the final ride is very comfortable. It may be
necessary to put another leaf back in making 5 on each side if the settlement ends up being to too much in the
next few weeks but at the moment it looks ideal. New U clamps (plated steel) were ordered and fitted from
“Speedway Motors”. A new leaf spring plate was manufactured to suit the width of the new bump stops
See more notes on the rear suspension with 2019 updates at shockers, bump stops and lowering blocks)
Also note "Obsolete Chevy Parts" were taken over by "Jim Carter Truck Parts".
Update 2020 In 2021 the rear suspension will be reviewed when the plan to upgrade the rear brakes
from drum to discs will happen. The number of leaves on each side will be reviewed. In preparation
for this to happen in 2019, in 2020 the rear axle was inspected, modified and improved. See below.
Update Sept. 2020 In September 2020 the springs were modified and reduced from 5 leaves to 4 leaves.
This made a softer more comfortable ride and lowed the truck about 10mm.
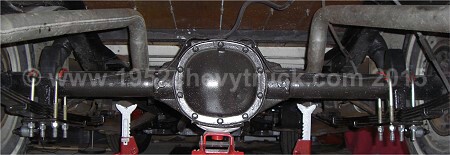
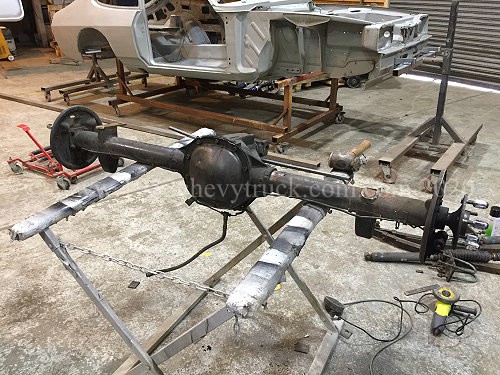
Rear Axle
Update 2020 Over the years the rear axle, brakes, springs and shockers have performed very well.
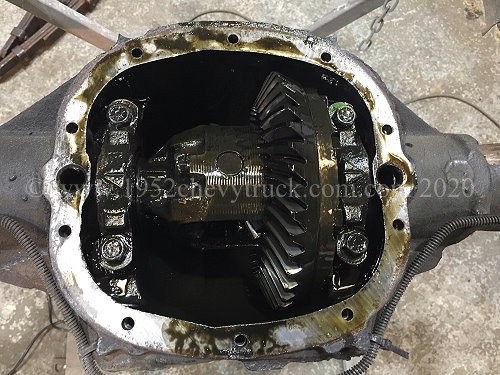
In 2020 a chrome diff cover was sourced from summit racing for this GM 7.5" 10 bolt rear axle.
In 2019 the rear axle was stripped down and inspected. It was all good and refilled with new oil.
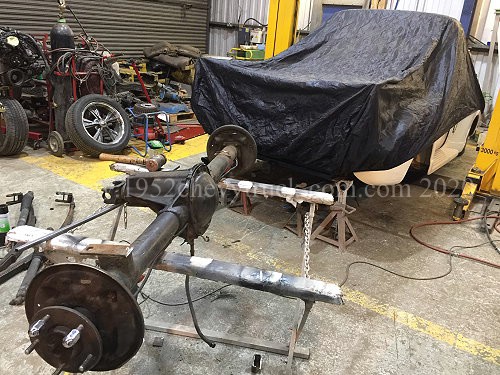
The spacer blocks on the axle which set the truck height were ground off and new ones fitted to lower
the truck a little more. The truck still feels a little high at the back and will be reduced about an
inch when the rear brakes are updated in 2021. Wilwood rear brakes will be fitted and that upgrade
will be detailed on this site in 2021. It should be noted that the ends housing is a GM flange.
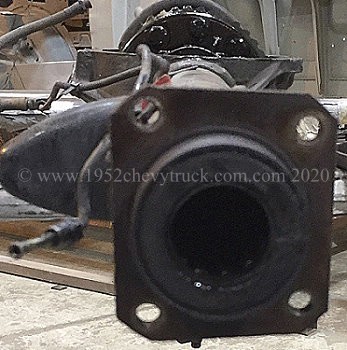
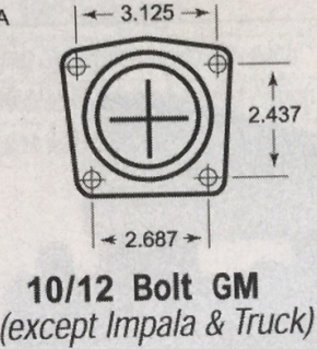
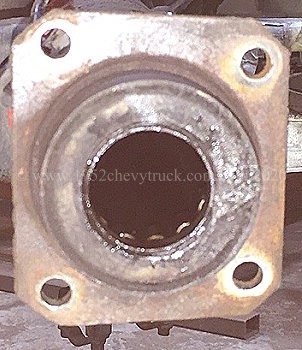
It was important to identify the end housing flange so that when the correct rear brake disc upgrade can
be ordered in 2021. With the corners of the flange chopped off, it could be mistaken for a "large GM flange".
Notice the typical small GM flange in the diagram has rounded corners so clearly the diagrams are not exactly
representative. What is important is the hole spacing. You can see the small GM flange has holes that are
closer together at the bottom than the top (the large GM flange has equal spacing). Also the hole spacing
was measured and agreed with this diagram. The 2 pictues of the flanges above are turned through
90 degrees since the axle is turned and the diff is pointing downwards.
One final point about the 7.5" axle. Many people on the web talk about upgrading the 7.5" axle to the
stronger 8.5" axle. Whilst this is true, it has never been an issue on this truck and the axle has
always worked well and reliably for me and the previous owner for over 20 years.
That being the case, why spend money and change something which does not need fixing?
June 2020 Update - Chrome Diff Cover.
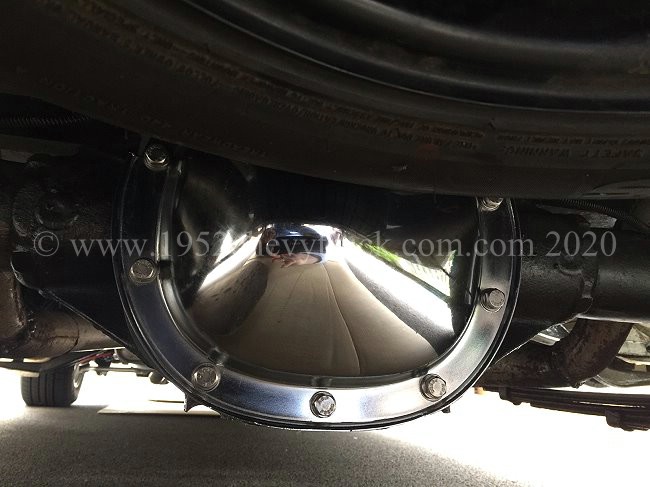
This cover was purchased from "Summit Racing" for Ł27.99 including gasket and bolts. The bolts were not
long enough. They needed to be 1" (25mm) long. It had already been decided to replace them with stainless
steel bolts and washers and these were sourced locally. The fluid (which was only replaced recently)
was drained, the cover replaced and the fluid put back. The fluid will be changed next years when
the upgrade to rear disc brakes is done (see below).
Sept. 2020 Update - Leaf Springs.
In September 2020 the springs were modified and reduced from 5 leaves to 4 leaves.
This made a softer more comfortable ride and lowed the truck about 10mm at the rear.
The ride height of the truck is optimised for performance and appearance. The height of the running board
(measured from the bottom of the running board) at the front is 200mm (8") and the rear of the running
board 204mm (9.5") from the ground. This gives the truck an good "stance".


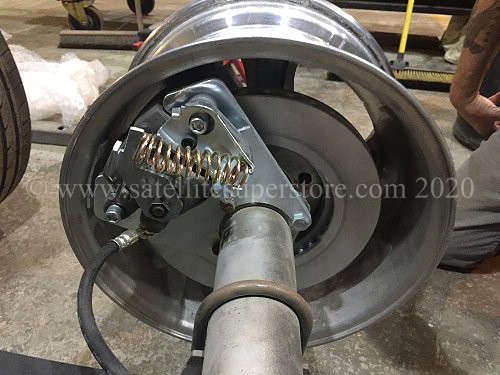
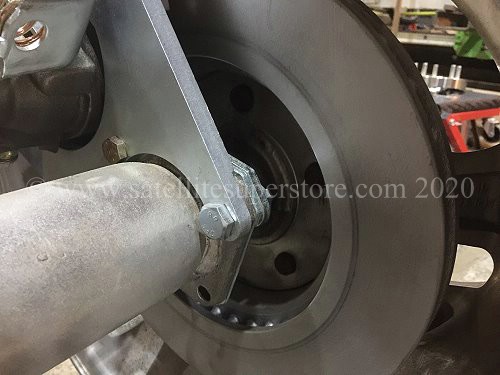
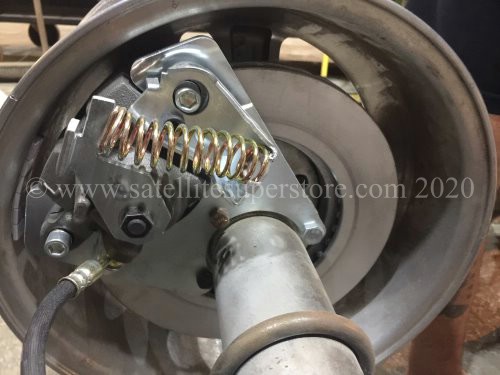
October 2020 - Rear Disc Brakes.
This plan for 2021 has been brought forward and will now be completed before the end of 2020.
The original plan was to buy Wilwood brakes, however, it was found they did not sell a rear brake kit with "e-brake"
which will fit a 15" wheel. A very good alternative was found using the Summit Racing "Rear Drum-to-Disc Brake
Conversion Kit". Summit Part Number - SUM-BK1623". this kit is only $349.99 but don't let this low price put
you off. This is a high quality well-made kit. The kit was ordered from Summit at the end of Sept. 2020.
Longer studs were also required and ordered. Summit part number Dorman 610-259 - Dorman Wheel Studs Wheel Studs,
Press-In, 7/16-20 in. RH, .475 in. Knurl, Chevy, Overall Length (in):1.750 in. Set of 10 from Summit racing $14.99
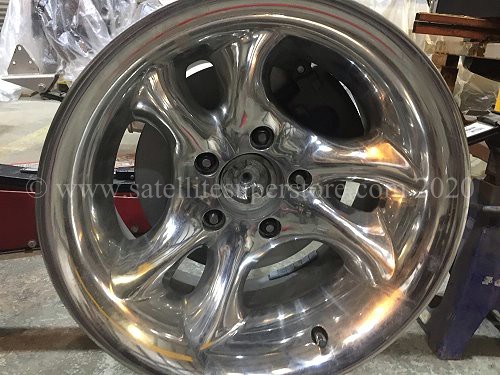
The pictures below show my wheels on my friends CEO project. I was able to test fit them on the same kit I was about to order.
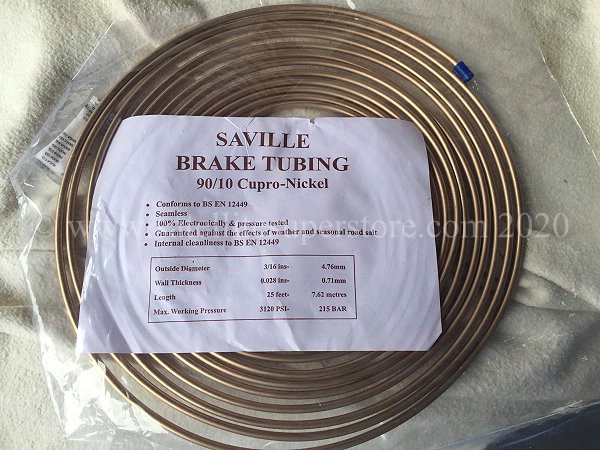
It is also be an opportunity to replace the hard brake lines. Probably the highest quality lines are nickel copper.
Another alternative is stainless steel but nickel copper is a softer material and easier to work with. It is also
possible to paint these lines with chrome paint where they can be seen in the engine bay at the master cylinder.
This nickel copper brake line was purchased from eBay for about Ł15.00. See below.
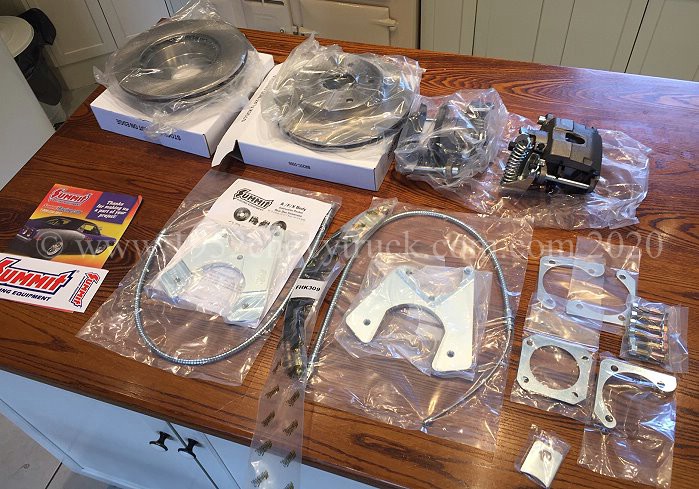
The Summit Racing rear brake upgrade kit arrived as shown below at the start of October 2020
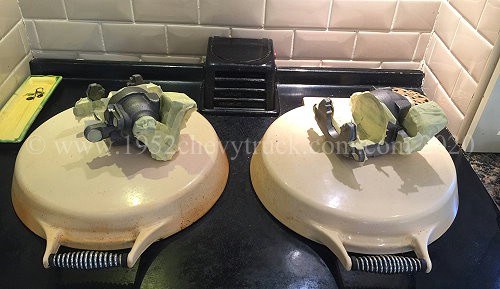
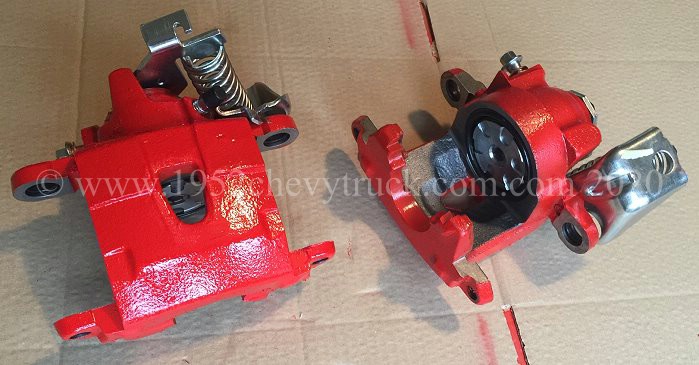
The calipers were painted red. You can see below, they were masked and heated on a stove and then sprayed red
using "MOTIP 04098 Brake Caliper Paint". Having already used this paint on my car brakes, I knew how good it
was. When reading reviews on this paint, mostly it gets 5 stars but sometimes 1 star. I believe these people
are not cleaning the calipers properly before application even though they claim they have. They should be
cleaned with "Panel Wipe" from a auto paint supplier store. Since the caliper manufacturer puts a coating of
protective oil on the caliper, I have found they need cleaning about 4 or 5 times with panel wipe. Also using
cotton buds to get into the corners. Only when the soaked cloth is completely clean after the 4th or 5th
attempt will the calipers be ready for paint. Also note - use panel wipe in a well ventilated area and avoid
breathing in the vapours and wear gloves. Several coats of paint are needed, allowing about 30 minutes
between coats. The process can be speeded up with a hair dryer. Then wait several hours before removing
the masking tape. Put a thin coating of high temperature lubricant on any non painted masked up areas where
it was removed. (The protective oil was removed from some of the casting where the masking tape was placed
so that the masking tape would stick to the surface.)
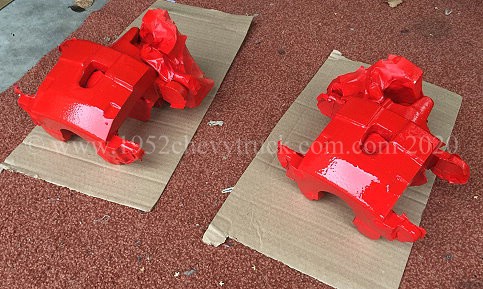
Masking tape removed below. The calipers now match the red Wilwood calipers on the front.
The rear drum brakes will be removed and the new disc brake upgrade kit will be fitted.
The parking break cable must be connected to the brake cables included in the kit.
The hard break lines will all be replaced with the new copper nickel pipe shown above.
The hard lines old brass T piece union will be replaced with a new brass T piece union.
The hard lines which are visible in the engine bay and are connected to the master
cylinder will be painted with chrome paint.
"Comma Dot 5.1" synthetic brake fluid has been purchased. Dot 4 is fine when drums are
on the rear but Dot 5.1 is recommended with disc brakes "all-round".
Finally it will be necessary to bleed the brakes and do a test drive.
This should all be completed before the end of October 2020.
Brakes Update December 2021.
It was decided there was so much information on the evolution of brakes right through to completion in December 2021
a page covering everything would be dedicated to this process.
Go to the "Chevy Truck Brakes" page for much more detail, more pictures and more information.