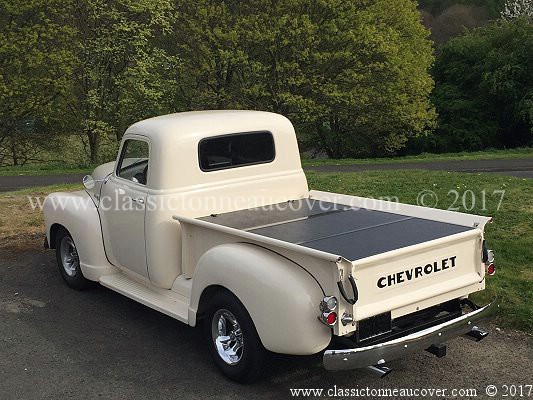

When the truck was first driven from Liverpool docks it was clear that is had some serious handling difficulties.
At about 60 mph the steering would drift and the truck would snake. To avoid it snaking you could
“go with the steering” and end up crossing the lane white line.
In the workshop, this was all quickly identified as steering geometry problems and some of the problem was
sorted out by setting up the caster, camber and tracking alignment. The tracking was found to be toed in by 10
mm! When it was adjusted to 2 mm some of the problems disappeared. This was done initially with a tape
measure by measuring the distance apart of the front edge of the front wheel rims (from the right wheel to the
left wheel) and repeating the measurement from the back edge of the two front wheels (across the width of the
vehicle). The tape showed a 10 mm difference (wheels were pointing inwards far too much). Making a
tracking adjustment by setting the difference to 2 mm did improved the handling of the trucks steering.
Later it was adjusted more accurately with a laser system but all it really needed was a tape measure and
someone who knew what they were doing (not me). Much larger improvements were made in Part 2 when other
larger problems emerged. See parts 2 and 3 for more progress. In the end there was about a years work went
into turning a truck that handled "like a pig" to a truck with sports performance while driving and cornering.
The early pictures taken above and in Part 1a show how good the truck looks but underneath there were many
problems that took a considerable amount of time to sort out.
Rocker covers, electric fan, electronic ignition. Nov. 07
Chevrolet rocker covers were ordered from GM Racing. They were textured aluminium. The lettering
was masked and they were painted with filler primer and then rubbed down. This was repeated many times
so that the texturing was eventually made smooth. Finally they were painted with Chevrolet orange to
match the engine. The bolts were replaced with stainless steel buttons.


The left hand picture above shows the engine compartment before it left the states. On the right, the UK Mods.
The left hand picture above shows the propeller fan and the right hand picture the electric fan.
The left hand picture above shows the old distributor and the right hand picture the electronic distributor.
The large propeller fan was noisy and inefficient. It was removed. An electric fan was fitted. The
Thermistor was fitted into the bottom hose using a custom made brass fitting.
The left hand picture above (and both below) shows the propeller fan and the
right hand picture above the new electric fan.


Chrome alternator, larger air filter on a chrome spacer


The alternator was upgraded to a 140 amp chrome unit. This will provide more charging capability for
the additional electrical upgrades in the future. A larger air filter was fitted on top of a chrome spacer.
See the picture above.
In 2015 a better fan and fan controller was fitted. See link to "Engine Upgrades 2015" below.
Update 2017 A large number of engine upgrades were done in June - Aug 2015. See Engine Upgrades 2015
Update 2020 Some addition "engine dress up" was done in 2010 See Engine Dress-up 2020
1952 Chevy truck with Nov. 2007 high intensity headlights.


High intensity dipped and main beam. In recent years high intensity lights have been possible using FOUR
headlights. Two of the headlights were used for dipped and two for main beam. In 2007 the first TWIN FILAMENT
high intensity lights were introduced. That meant that dipped and main beam could be fitted into one headlamp unit.
The backs of the headlights in this truck, were cut, extended backwards to form a longer steel “blister” to
accommodate the twin control circuits in one self contained water-tight unit. (see picture)
High intensity lights are discharge tubes which strike at 2500 volts and run at about 1600 volts.
They are much brighter than halogen lamps.
Update 2020 These headlights have worked brilliantly over the years and have never needed any attention.
55w tail light modifications.


The tail lights on the truck that were fitted by the previous owner were made of plastic and looked like they
had come from a modern trailer. It was decided to fit some new tail lights from the 1950s.
The 52 truck would have had lights that were chrome and looked rectangular with rounded corners. My
preference was for the round lights from a Chevy 1954 truck. Not exactly original but I liked them better and
that is what was ordered. These were supplied in stainless steel and fitted.
It was then decided to double up and add two more light assemblies as back up lights. Brass strip brackets
were made and chromed and the extra lights were then ordered and fitted.
The bulbs selected were special 55 watt halogen lamps and fittings and special plastic diffuser lenses were
custom made. The problem then was that after about 10 seconds of being in reverse, the plastic diffuser
melted. The solution was to use 4mm thick glass and this was ordered and cut in a circle and drilled for the
two retaining bolts. The glass was fitted inside of the plastic diffuser lenses. It was then possible to be in
reverse for more than 2 minutes without the diffuser melting. Clearly these reversing lights are very effective
and the two stacked lights on each side of the truck look very good.
More recently lights were added to the ends of the bed rolls. These are additional tail lights but relays and
components are to be added to they also act as turn signals. They are only single filament bulbs but making
them dual purpose with a control circuit is not a problem. They will go on and off when the turn switch is
used and will be in phase with the main turn lamps that are below them.
2016 Update - In 2016 the lights were upgraded again. This time to LEDs.
The mounting brackets and wiring were also upgraded and improved.
See Upgrading The Tail lights 2016.
Update 2019 - In 2019 dome headed nuts replaced normal nuts to further improve the appearance.

Plans for the cab upgrades.

The original cab seats were reupholstered when the truck was restored in 1998 and they are still in perfect
condition. (between 1998 and 2007 the truck had only done 1000 miles) but these bench seats (like all many
old vehicles) are not very comfortable. In the driving position you tend to slide towards the door. Modern
10-way powered front seats (like the ones in my 2005 MC Yukon Denial) have been sourced and will be
fitted in later. 2016 Update The final cab upgrade was done in 2016 as shown later.
Some early cab upgrades can be seen at Cab upgrades 2008
2016 Update - Many more cab upgrades were done in 2016 as shown later on in this site.
see upgrading the seats 2009.
and upgrading the interior 2016.


